The Tutorial
I am going to walk you through the steps of creating a logo, with a custom silhouette logo mark, for a fictitious steak house restaurant named “Lone Star Steaks”. I have already sketched out a few concepts and am settling on the one you see below. As you can tell, it is a pretty crude rendering. But this is only intended to give me points of references for the idea.
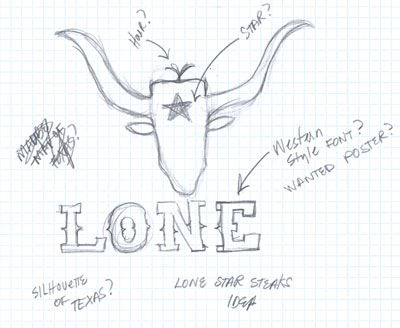
We are going to trace a picture of a “longhorn” using the Pen and Pathfinder Tools and we are going to slightly customize the free font, Saddlebag, for the type treatment. Here is what you will need to complete this tutorial.
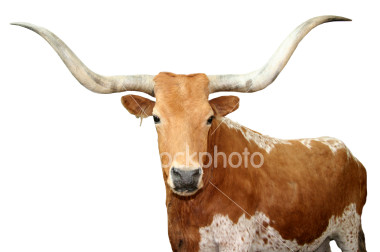
Download a comp of a
Texas longhorn.
Let’s begin
Step 1: Set up your document
- New Document: Illustrator Letter Size
- Drag out two guides, center and then lock them on>
- Optionally, you can turn on the rulers Ctrl+R.
Step Two: Set Up Image
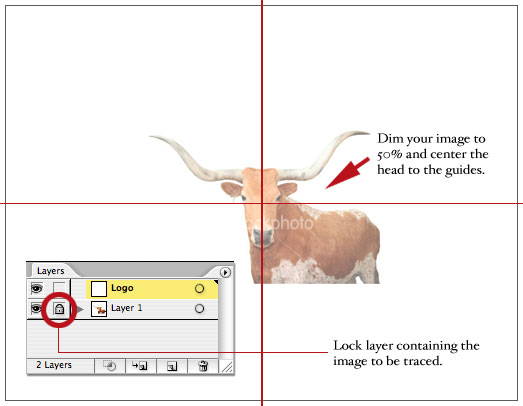
- Select the image and center the head of the longhorn with the guides.
- Double click Layer 1 to bring up the Layer Options palette window and select Lock and Dim Images to: 50%.
- Finally, create a new layer above Layer 1 and name it “Logo”.
This is the layer you will be creating your logo in. Your document should look like this:
Step 3: Trace the image
-
Remember that we only want to trace half of the head.
-
With the Pen Tool selected, trace around the right of the head only beginning and ending the trace at the center guide.
-
For the right ear, select the Ellipse Tool and draw an oval over the ear. You may need to reposition the oval to fit nicely over the ear of the image.
-
Finally, trace the horn with the Pen Tool.
-
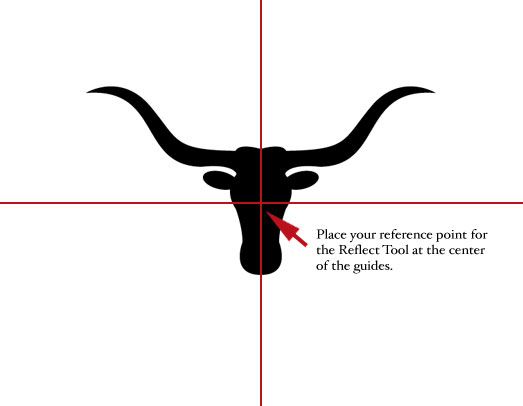
Select all three shapes. From your Pathfinder Palette Window, select Unite. You have now created half of the longhorn head.
-
Select your new shape and click on the Reflect Tool from the Tools Palette. Make a reference point at the center of the guides. Holding down both Option and Shift simultaneously, rotate and create a duplicate of the shape to form the left portion of the head. Once again, select both shapes and click Add To Shape Area – Expand. The head is complete.
-
Unlock Layer 1 and delete the photo. You no longer need it.
Step 3: Detail
Now your logo is beginning to take shape.
-
Next add a “star” to the center of the longhorn mark to further play up the Texas and Western themes.
-
Select the Star Tool from the Tools Palette and set the Fill color to white and the Stroke to none.
-
From the center guide, hold Option and Shift simultaneously to create a perfectly centered 5 point star.
-
Once you are satisfied with the placement of the star, select it and the longhorn shape and group them together.
-
Lastly, create highlights for the ears, this is the detail that will make your logo pop.
Now find a font to fit you western them and type
Lone Start Steak

|
